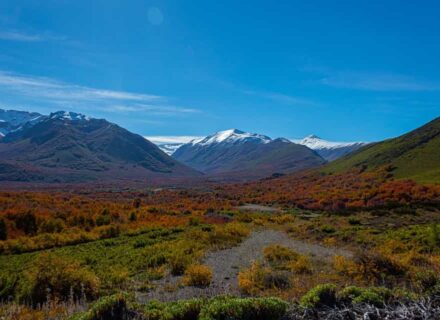
Patagonia travel triggers visions and feelings of extreme adventure for trekkers around the world. You’ve seen the pictures on-line and you’ve heard stories about the unpredictable weather, vast glaciers, snow capped Andes mountains and the dramatic reward of hiking in Patagonia. Are you ready to hike one of the most renowned treks in the world? Torres del Paine National Park will satisfy that adventure craving. We share our experience hiking in Patagonia through the Torres del Paine circuit in southern Chile.
A Guide for Hiking in Patagonia
This is a lot of useful information for hiking Torres del Paine, so we have broken up the guide into a series of posts. Be sure to check them all out.

When to Go
In Patagonia, the weather is extremely unpredictable and for most of the year unbearable to hike due to high winds, below freezing temperatures and ice. The park remains open all year, but unless you are an experienced adventurer with ice hiking skills, you will most likely want to hike in the Summer (Nov-Mar).
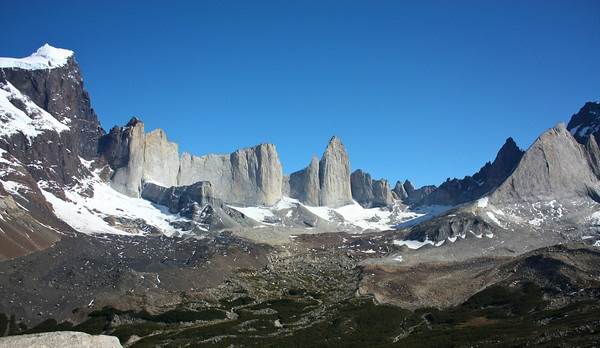
Summer (Nov-Mar) is the peak season for trekking in Torres del Paine National Park, which creates over crowded campsites and trails. It’s warmest in the Summer, averaging 11ºC/ 52ºF, but the Patagonia weather still remains unpredictable with possibilities of rain, snow and high winds, which can disrupt your most anticipated trip to Torres del Paine. Low hanging clouds around the towers and dense fog can also hide the great Patagonia views of amazing landscapes and the three towers.
We arrived to Torres del Paine in mid-March when the crowds had dissipated and the weather is supposedly most stable. I admit, we got very lucky with the weather. Our trek began with 2 days of cold rain and below freezing nights. As the days progressed, the weather improved with sunny warm days and clear skies. As we descended the towers at the end of our 9-day full circuit trek, the clouds moved in, the winds picked up and the rain began. We highly encourage that you pick the time of year carefully.
What To Bring
Since we were traveling for a full year when we planned our Patagonia hike, we didn’t have tents, sleeping bags or a camping stove. We rented all of our equipment from Glacier de la Patagonia in Puerto Natales. They have good quality equipment all from the same manufacturer, Doite. If you are flying down to Patagonia specifically for hiking, bring your own gear from home. The quality of your gear will most likely be better and you will be saving money. Make sure your tent can withstand Patagonia winds and rain.
Sleeping bag
This is Patagonia, it is cold. We opted for the -10 degree Celsius by Doite and we still felt cold on a few nights.
Sleeping Pad
The ground is hard and cold, don’t skimp on the sleeping pad. The ones we rented weren’t very thick. Consider renting 2 if they appear thin and worn.
Tent
We rented a Himalaya Doite Tent which was the smaller one of the two that Glacier de la Patagonia offered. Another afterthought, we should have opted for the larger tent for more comfort and little additional weight.
Cooking Stove and Pots
Keep it light. One pot and one spoon is enough for 1 person. Be sure to have a multipurpose knife. You can’t fly with the fuel needed to light your stove, but there are many places here to buy them.
Food
This was our biggest mistake. We didn’t bring enough and therefore had to buy some along the way which was very expensive. Even with end of season discounts, the food prices were jacked up.
Several of the campsites have items to sell such as camping food, snacks, wine and beer. You will be hiking 6-8 hours daily and our bodies require fuel. Identify ways to keep the food weight to a minimum, but make sure you’re getting enough calories and replenishing your energy sources. You can drink water from small streams that cascade down the mountains.
Clothing
Dress warm and avoid the cotton underwear and shirt. You will be sweating a lot and with few showers those cottons clothes will quickly stink. It will be freezing at night and either freezing during the day, or sunny and clear skies. Just focus on layers instead of big thick jackets that take up too much room. Layers are always recommended for easy taking off and putting on of clothes. Boots are absolutely necessary. We hiked on rocks, through mud and in snow at times. Pack a wind and rain breaker and hats and gloves.
Other Gear
Walking sticks are optional, but we decided to rent them. I felt as though it was a good decision, but they aren’t absolutely necessary. Bring head lamps or torches, and rope for hanging wet clothes and food in the woods. If you don’t hang your food or secure it incredibly well, mice will get into it. Also bring sunglasses, sunscreen, a map of the park and toilet paper! In the winter the gear completely changes and I am not an expert in in extreme conditions, sorry.
How to Get There
You can fly there, bus it or take the adventurous Navimag vessel through southern Chile’s islands.
You can access Torres del Paine National Park from the gateway town of Puerto Natales. Puerto Natales provides hostels, hotels, restaurants, shopping and anything else you might need for your trek. If you plan to go during high season, be sure to book your hostel ahead of time.
Flights arrive to Punta Arenas, usually with a stopover in Puerto Montt, which lies on the Straights of Magellan. From Punta Arenas you will bus it 3 hours north to Puerto Natales.
You can bus it from Santiago, Chile, but it’s a very long 3100 km trip. If you are visiting Puerto Montt you can also fly to Punta Arenas or bus it to Puerto Natales.
In order to arrive at the entrance of Torres del Paine, catch a bus early in the morning from Puerto Natales. It’s 115 kilometers away and gates open at 8:30am
More Torres del Paine Hiking information to come!